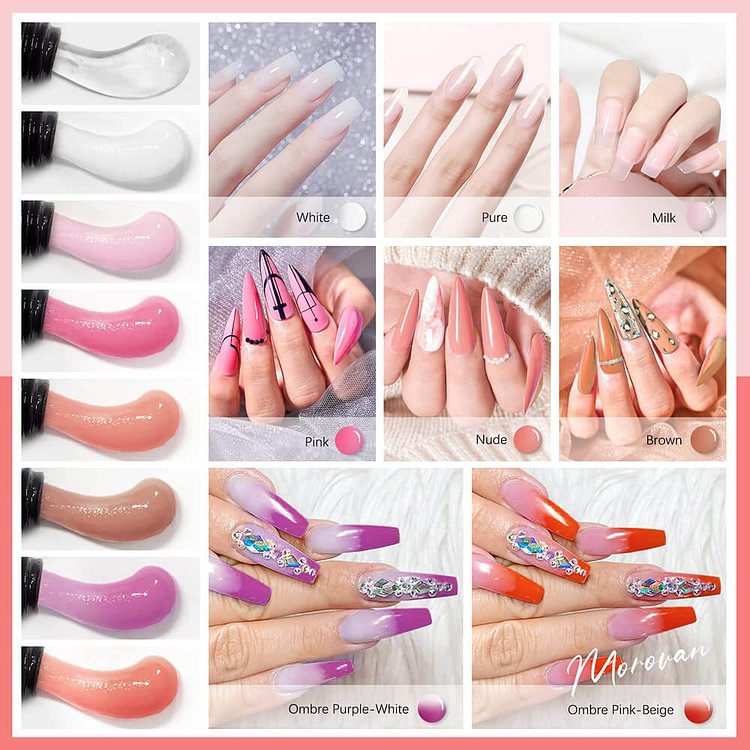
Okay, let's talk about nails. Specifically, polygel. I have a confession: I’m not a nail tech. I just like shiny things.
And look, going to the salon? Expensive! Plus, sometimes they give you the side-eye when you pick the fifth glitter color. So, DIY it is.
The Morovan Polygel Kit: A Love-Hate Relationship
The Morovan kit, it's got everything. Sort of. You still need a good YouTube tutorial and maybe a therapy dog. Just kidding... mostly.
Step 1: Prep Like Your Life Depends On It
First, you gotta prep. Push back those cuticles! File those nails. Buff, buff, buff until your arms feel like jelly.
I know, it's boring. It's like the broccoli of the nail world. But trust me, skipping this is a recipe for disaster.
Step 2: Picking Your Weapon (Polygel Shade)
The fun part! Picking a color. So many choices! I usually end up going with something sparkly. Shocker.
Don't be afraid to mix and match! Experiment! It's your nail, your canvas. Embrace the chaos!
Step 3: The Polygel Glob: Less is More (Supposedly)
Okay, now the tricky part. Squeezing out the polygel. You want a *small* amount. I repeat: small!
I know, it’s tempting to go big. Trust me, a giant blob of polygel is your enemy. It just ends up looking like a lumpy potato.
Step 4: Slip Solution: Your New Best Friend
Slip solution! This stuff is magic. It’s basically nail wizard juice.
Dip your brush. Shape the polygel. Don't be afraid to get messy! That’s what cotton pads are for.
Step 5: Form is Key (Or at Least Helpful)
Dual forms. These little plastic things are lifesavers. Press the polygel onto the form. Flip it over and apply to your nail.
Sometimes they fit perfectly. Sometimes they’re a little wonky. It’s okay! We're going for "rustic charm" anyway.
Step 6: The UV Lamp of Truth
Stick your hand in the UV lamp. Bake those babies! The instructions will tell you how long. Usually around 60-90 seconds.
While you're waiting, contemplate your life choices. Maybe question that extra scoop of ice cream you had last night. Just kidding! (Mostly.)
Step 7: Pop That Form Off!
Pop off the form! Hopefully, it comes off cleanly. If not, don't panic! A little filing can fix anything.
Remember that "rustic charm" we were going for? Yeah, we might need a little more filing than planned. It’s fine.
Step 8: Filing and Shaping: Embrace the Grind
File, file, file! Shape, shape, shape! This is where you turn your lumpy potato into a (somewhat) presentable nail.
Don't be afraid to get creative! Round, square, stiletto... the possibilities are endless! Just don’t accidentally file your finger off. Ouch.
Step 9: Top Coat: Shine Bright Like a Diamond
Top coat! The final step. This is what makes your nails look professional-ish. Apply a thin, even layer.
Cure it under the UV lamp. Boom! Shiny, gorgeous nails (hopefully). If not, well, there's always next time.
Step 10: Admire Your Handiwork (and Hide Any Imperfections)
Admire your handiwork! Show off your new nails! Take lots of pictures! Filter them heavily.
And remember, practice makes perfect (or at least slightly less imperfect). So keep trying! And don't be afraid to laugh at your mistakes. We all make them.
Unpopular opinion: slightly crooked nails are charming. They show character. They tell a story. A story of glitter and determination.
Now go forth and conquer the world, one slightly imperfect polygel nail at a time! You've got this! (Probably.)


