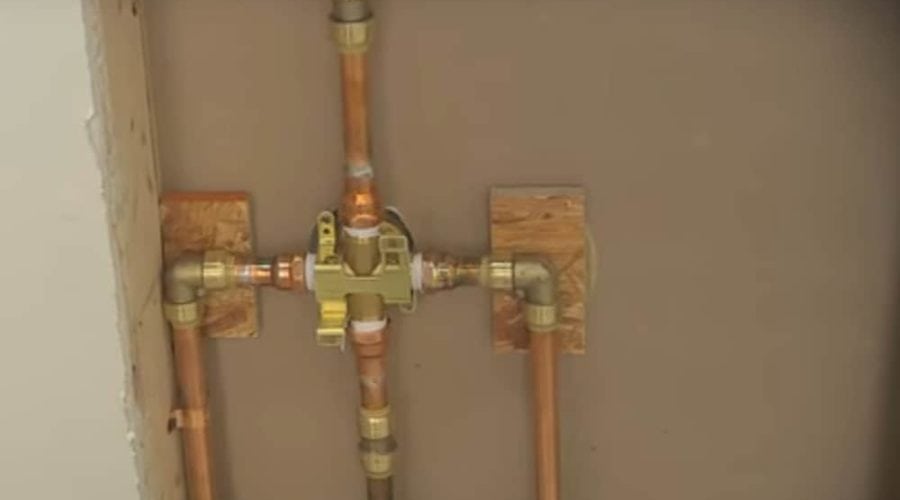
Ready to Ditch That Drip? Let's Install a Delta Shower Valve!
Okay, folks, let's talk showers. Not the relaxing, spa-day kind. We're talking about the kind where you wrestle with a temperamental faucet that either scalds you or freezes you solid. Sound familiar? Time for a change!
We're diving headfirst into installing a brand-spankin' new Delta shower valve! Now, I know what you're thinking: "Plumbing? Me? Absolutely not!" But trust me, with a little courage (and maybe a pizza bribe for a handy friend), you can totally nail this.
Gearing Up for Glory
First things first: gather your tools! You'll need a screwdriver (Phillips and flathead – like Batman, always prepared), adjustable wrench (your new best friend), pipe wrench (for the serious stuff), Teflon tape (plumber's best friend), and maybe a bucket (just in case!).
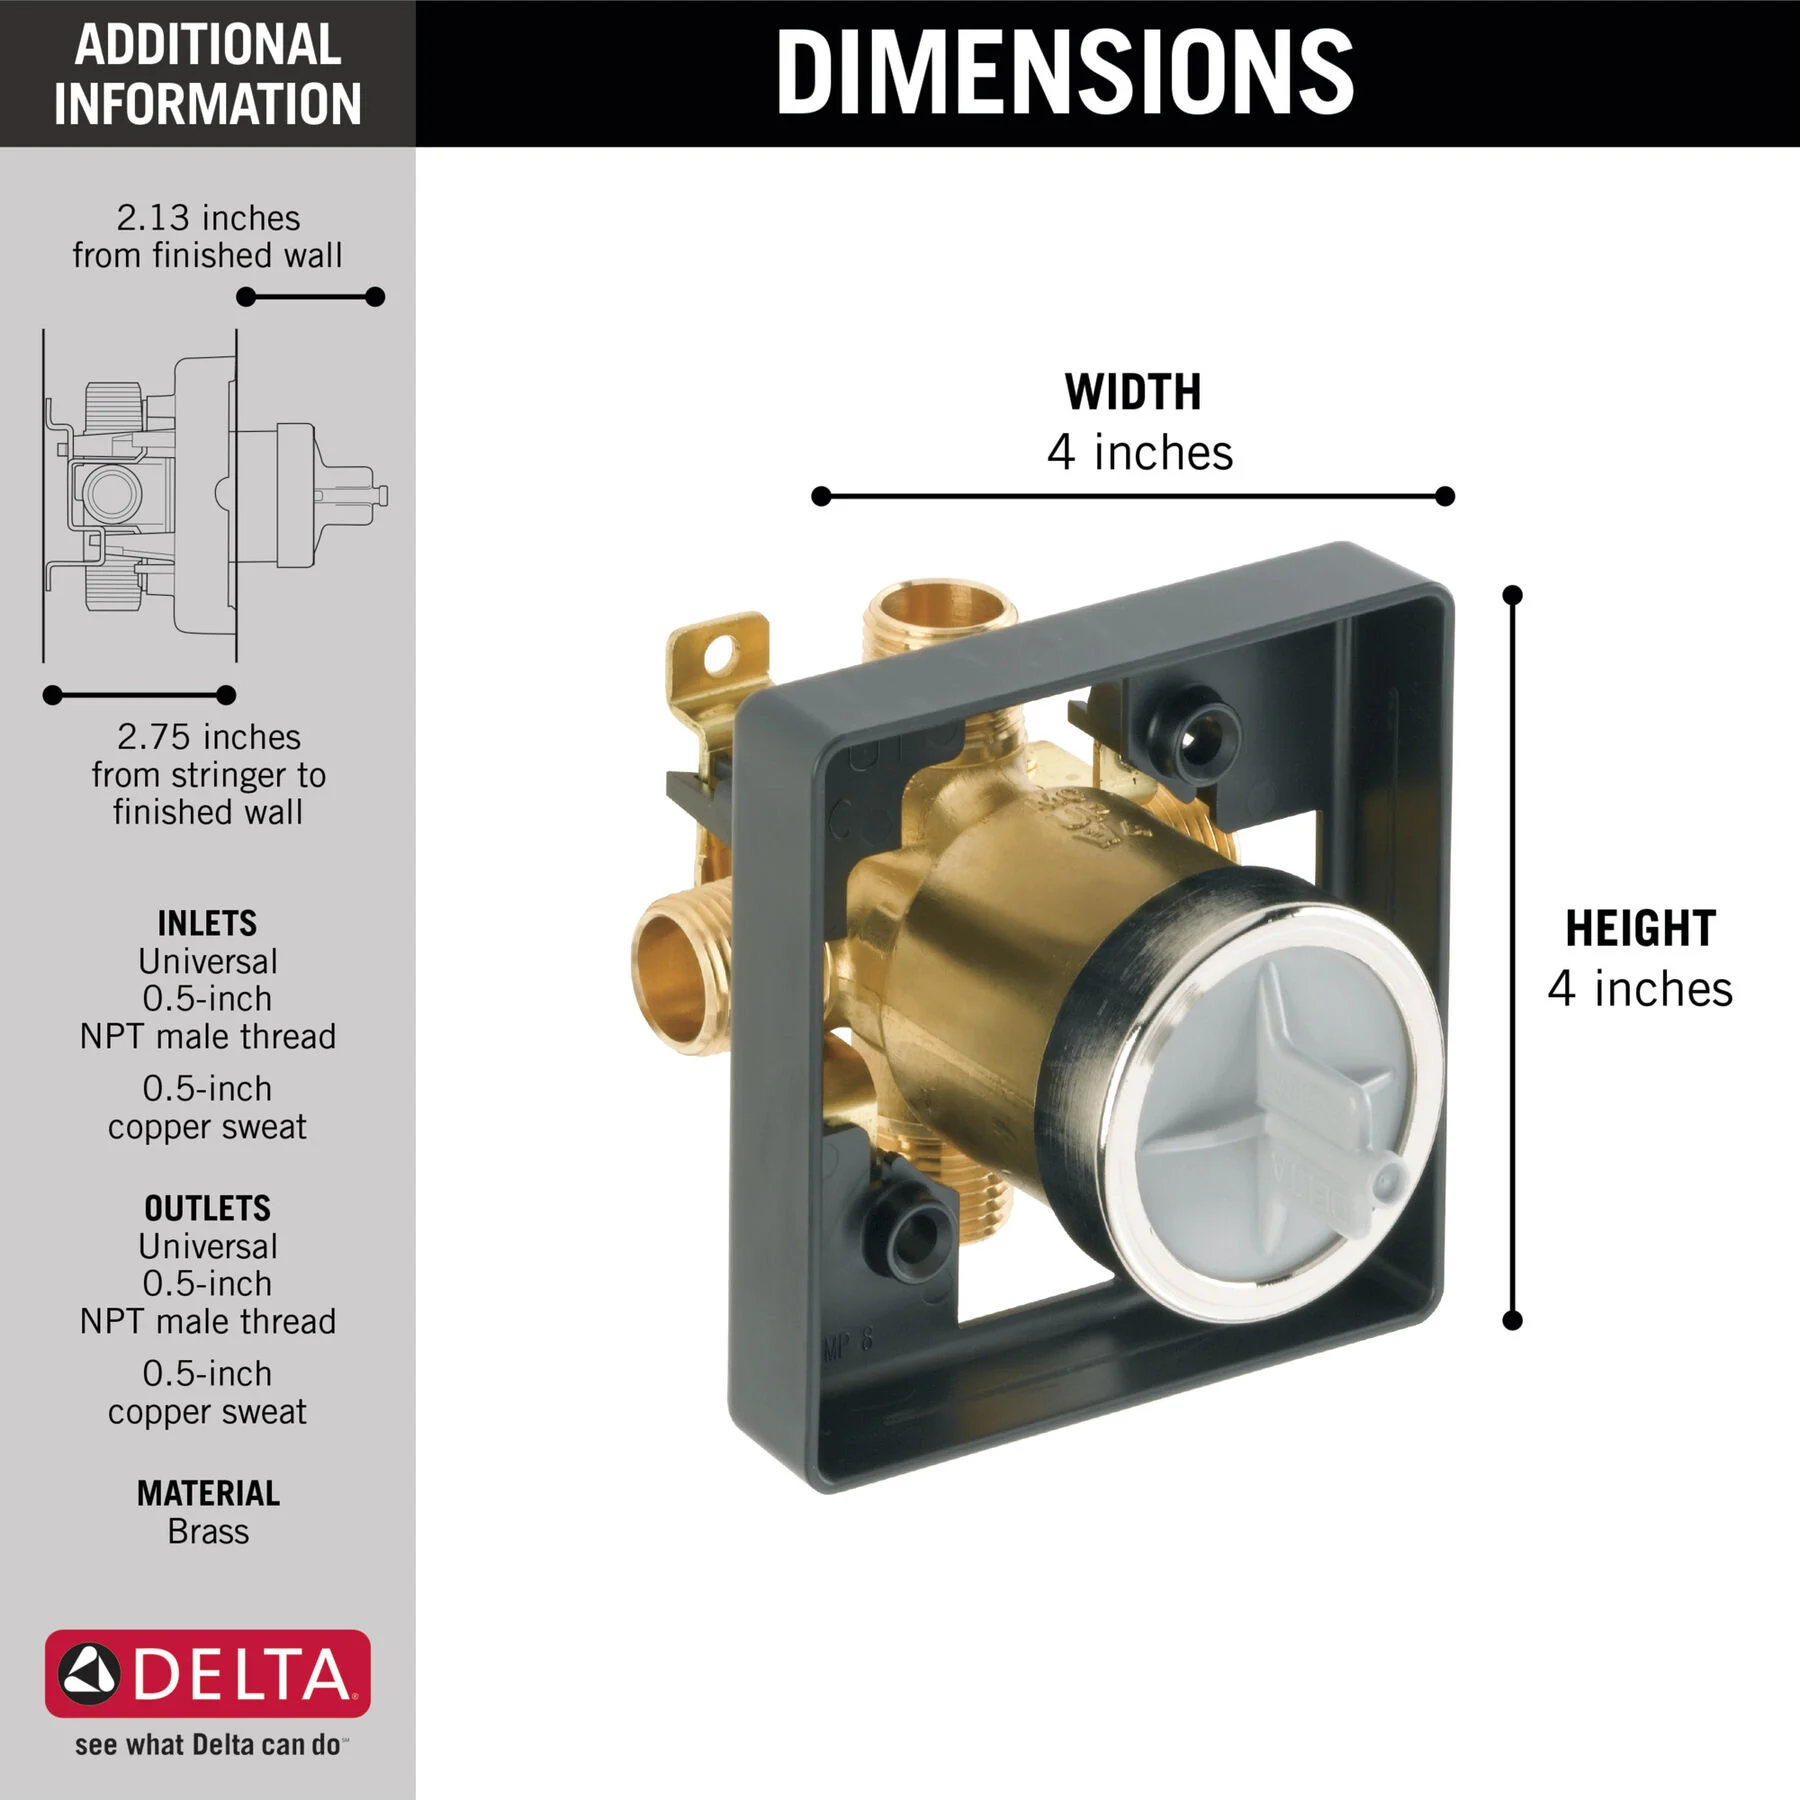
Of course, you'll also need your shiny new Delta shower valve. Make sure you've got the right model for your needs. It's like picking the right lightsaber – crucial!
Operation Shut-Off!
Before you do anything, find your main water shut-off valve. It's usually in the basement or near your water meter. Turn that bad boy off! You'll thank me later when your bathroom isn't transformed into an indoor water park.
Open the old shower faucet to relieve any pressure in the lines. A few drips? Good. A geyser? Maybe double-check that shut-off valve!
Dissection Time! (aka Removing the Old Valve)
Now, let's get medieval on that old valve! Unscrew the handle and escutcheon plate (that fancy metal circle behind the handle). You might need a screwdriver for this, or maybe a friendly smack with a rubber mallet (gently!).
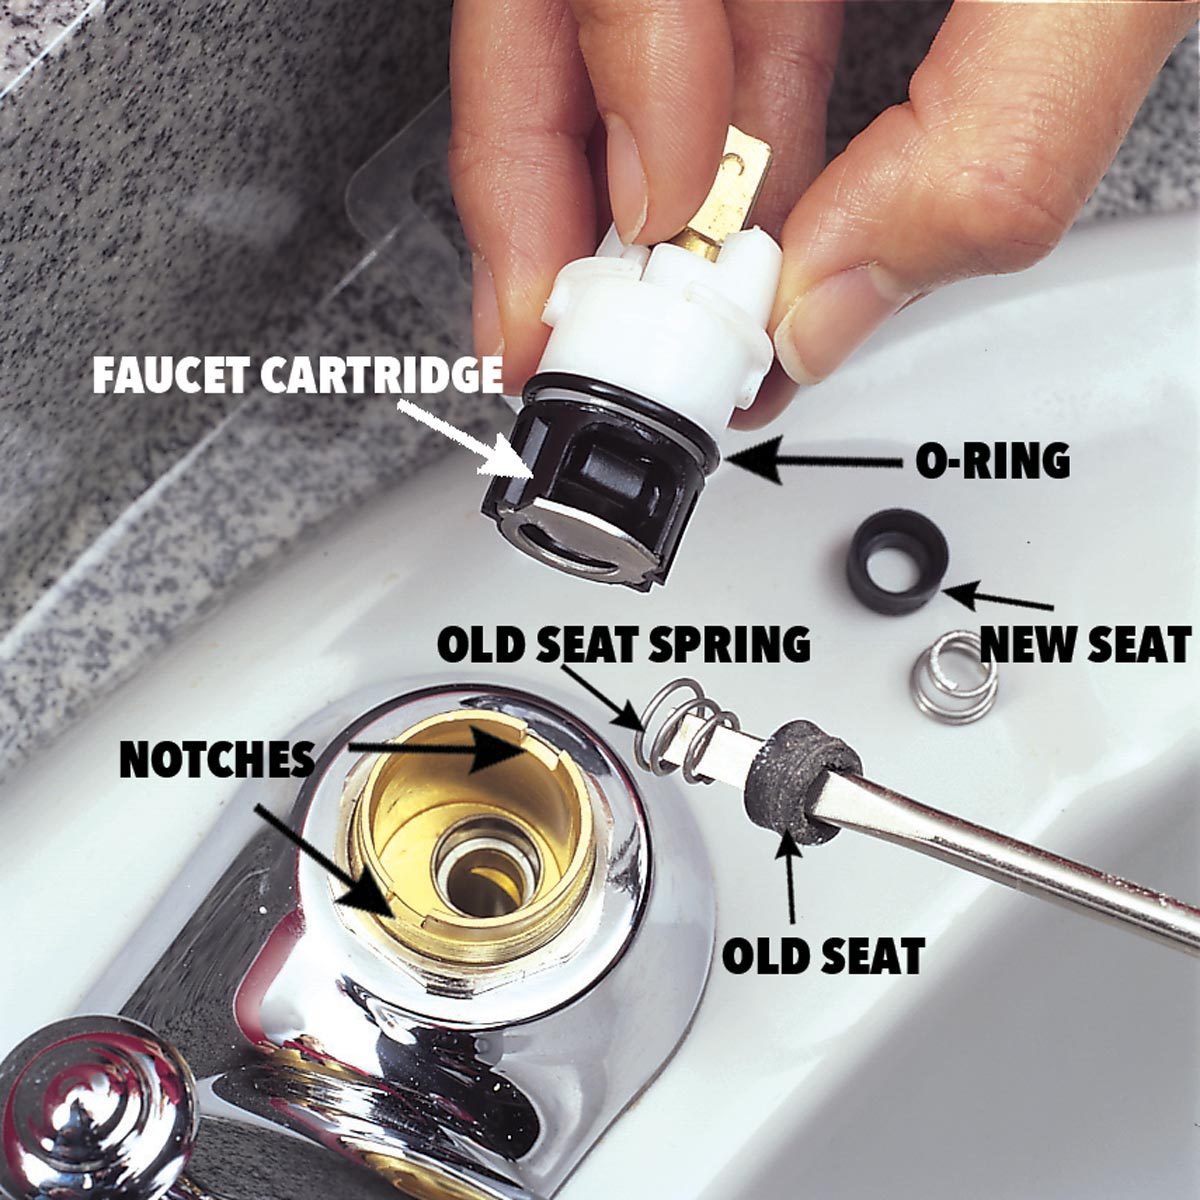
With the handle and plate out of the way, you'll see the valve cartridge. There might be a clip holding it in place – remove that little rascal. Now, use your pliers to gently pull out the old cartridge. Be careful, some water may still drip out.
Next, disconnect the water supply pipes from the old valve body. This might involve unscrewing fittings or cutting pipes (if you've got copper pipes). A pipe wrench will be your best friend here. Remember to always turn the wrench in the correct direction.
Installing the New Shiny Goodness
Time for the main event! Grab your new Delta shower valve body. Before attaching anything, wrap Teflon tape around the threads of the water supply pipes. This creates a watertight seal. Think of it as the valve's security blanket.
Carefully connect the water supply pipes to the new valve body. Make sure everything is snug but not overtightened. You don't want to crack anything! Just firm and secure.
Now, install the new valve cartridge into the valve body. It should slide in easily. Reinstall the clip (if there was one) to secure it in place.
Put the new escutcheon plate and handle back on. Tighten the handle screw. You're almost there!
The Moment of Truth!
Slowly turn the main water supply back on. Keep a close eye on all the connections for leaks. If you see any drips, tighten the fittings a little more.
Turn on the shower faucet and test the water temperature. Hot? Cold? Just right? If everything is working properly, you've officially conquered your shower valve installation!
Victory Lap!
Congratulations! You've successfully installed a Delta shower valve. Bask in the glory of your accomplishment! You are a plumbing rockstar! Now go enjoy a nice, relaxing shower without the temperature rollercoaster.
Don't forget to clean up your tools and dispose of the old valve properly. You've earned a pizza and a cold beverage. Enjoy!
Delta, your new shower hero!


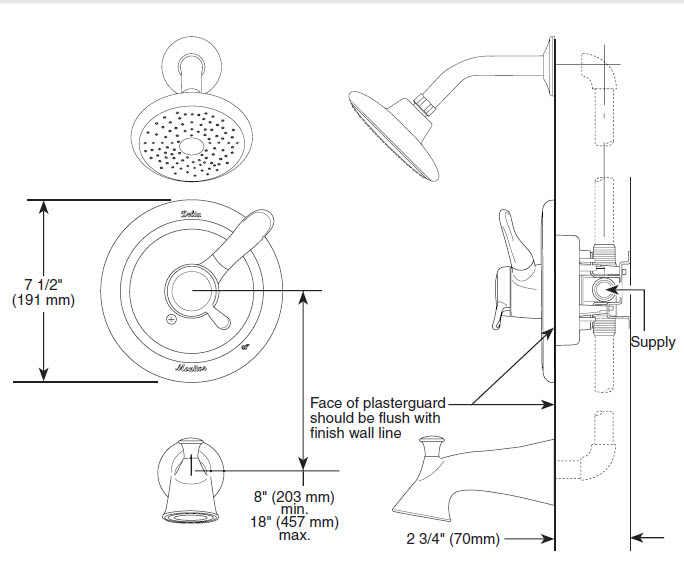




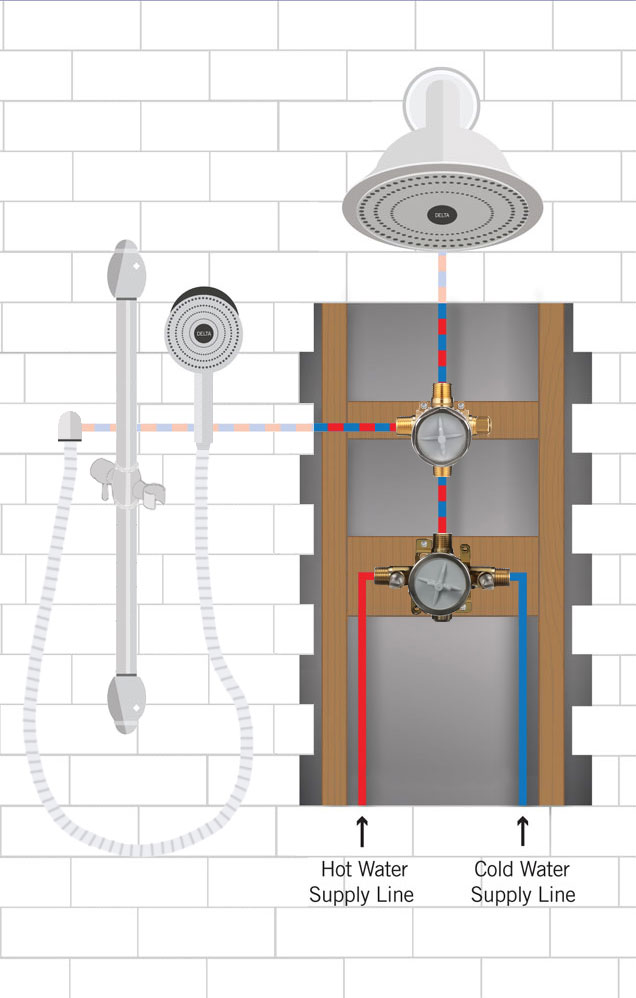
![[DIAGRAM] Delta Shower Faucet Installation Diagram - WIRINGSCHEMA.COM - How To Install A Delta Shower Valve](https://i.stack.imgur.com/aI1si.jpg)


