So, you're thinking about adding a pocket door? Awesome! Forget those space-hogging swinging doors, let's tuck that door neatly away. It's time to get your hands dirty and build a frame!
Gather Your Supplies (The Fun Part!)
First, raid your local lumber yard. You'll need studs, typically 2x4s, to create the frame's structure. Also grab some plywood or OSB for the header and track support, and screws!
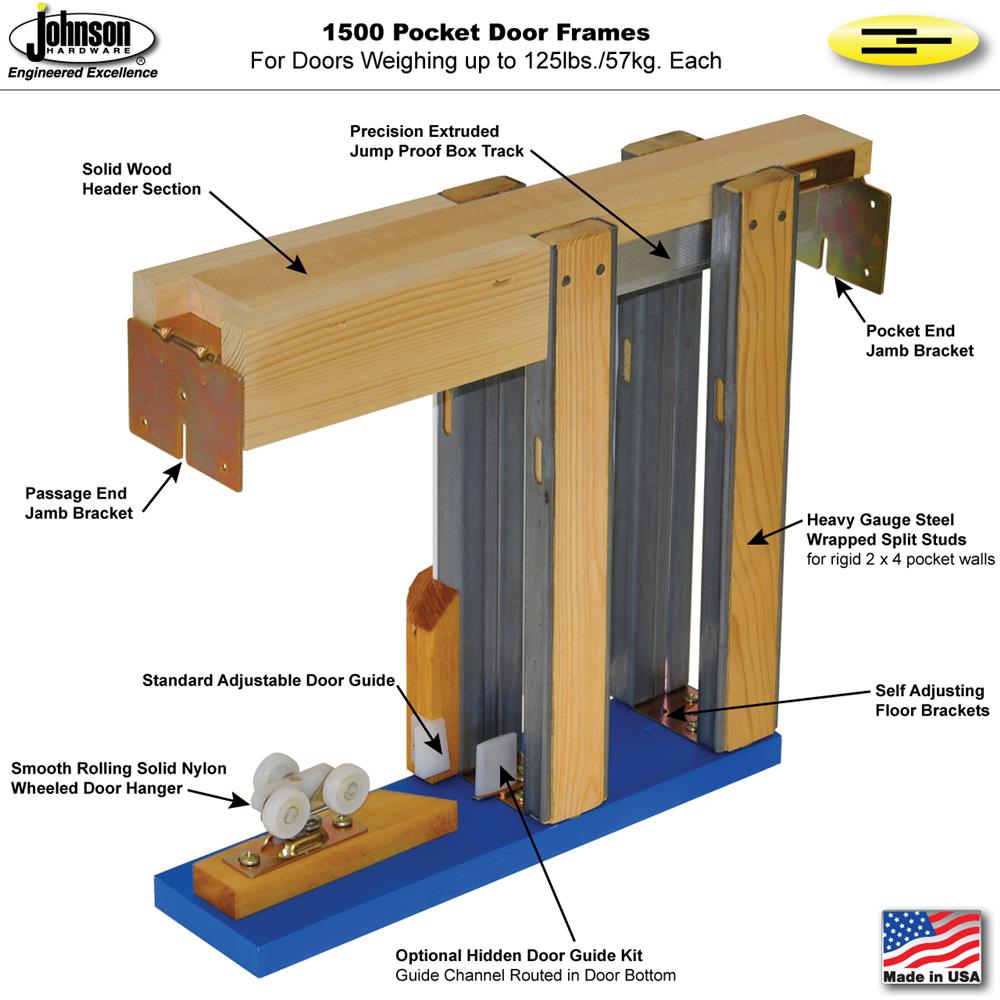
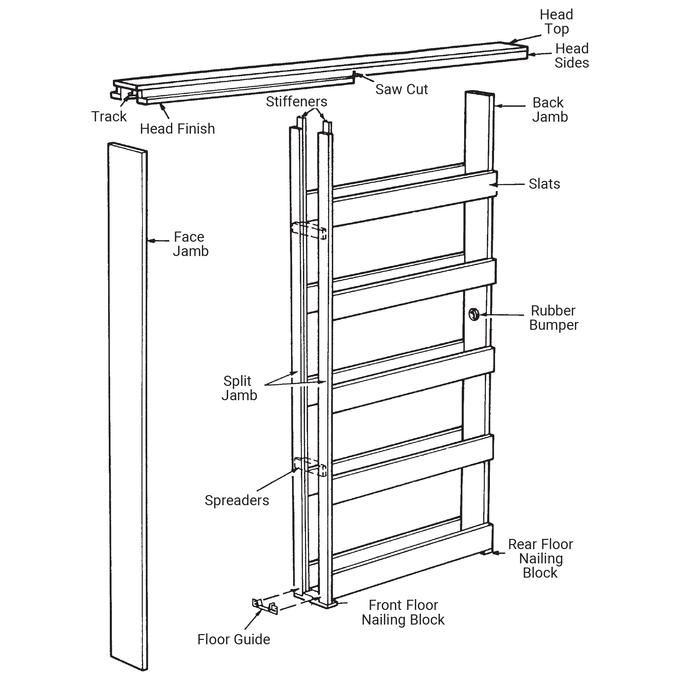
Don't forget the pocket door hardware kit. This is basically the brains of the operation, and includes the track, rollers, and other essential bits.
And of course, your door slab. Measure it before you begin building your frame to avoid any surprises.
Frame Construction: A Symphony of Wood and Screws
Time to get building. We’re diving in!
Step 1: Measure Like a Pro (Almost)
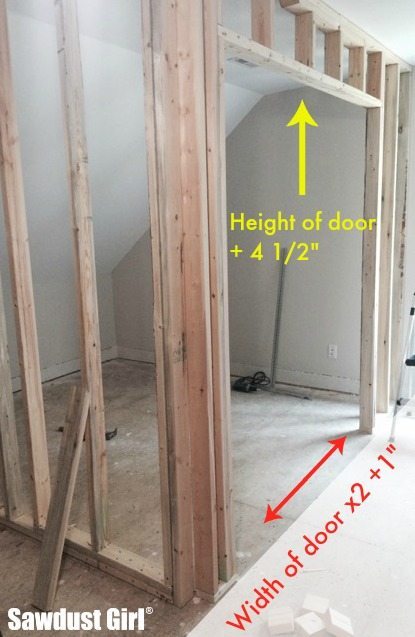
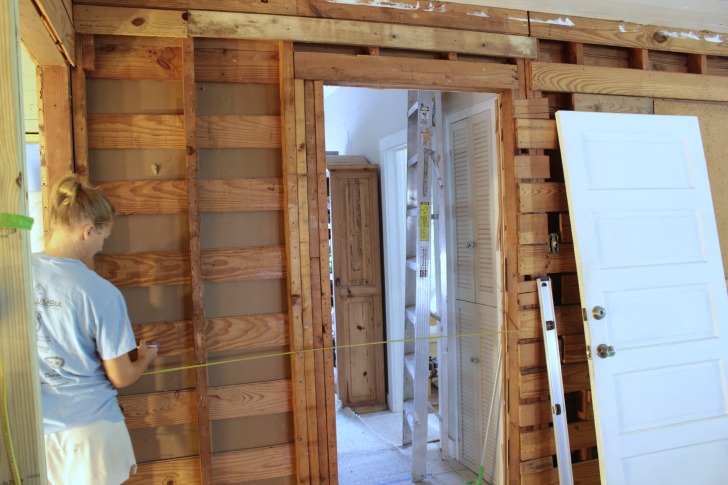
Measure the width of your door. Now add about 2 inches for clearance. That's your rough opening width!
For the height, measure your door's height. Add a couple of inches for the track and rollers. Bam! You've got your rough opening height.
Step 2: Cutting the Studs: Like a Lumberjack (Sort Of)
Cut your vertical studs to the rough opening height, minus the thickness of your header. Precision is key, but don’t sweat if it’s not perfect, wood filler is your friend!
Cut the header to the rough opening width. This is the horizontal piece that sits at the top of the frame.
Step 3: Assembling the Frame: A Structural Masterpiece
Create a rectangle using the studs and header. Attach them using screws. Make sure everything is nice and square.
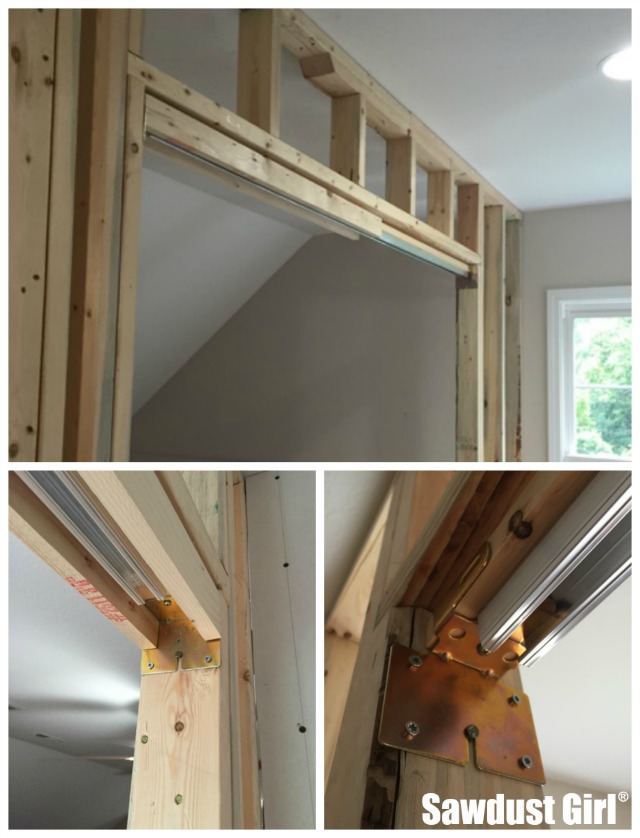
Now for the tricky part: creating the "pocket." You'll need to add extra vertical studs on each side of the opening. These act as supports for the track and keep the door from rattling around.
These studs should be spaced according to the instructions in your pocket door hardware kit. This is the key step in the whole process.
Step 4: Adding the Track Support: Smooth Sailing Ahead
Cut pieces of plywood or OSB to fit between the vertical studs above the opening. These will support the track.
Securely attach the plywood or OSB using screws. This needs to be solid, as it will be holding the weight of the door and the track.
Step 5: Installing the Track: The Heart of the Operation
Install the track according to the manufacturer's instructions. This usually involves screwing it to the plywood or OSB support.
Make sure the track is level and securely attached. A wobbly track means a wobbly door, and nobody wants that!
Step 6: Fine-Tuning and Adjustments: Almost There!
Hang the door on the rollers, following the instructions in your kit. Gently slide the door back and forth to make sure it moves smoothly.
Adjust the rollers as needed to ensure the door hangs straight. Most kits have adjustable rollers, so tweak them until you're happy with the alignment.
Finishing Touches: The Icing on the Cake
Add trim around the opening to hide the frame and give it a polished look. Caulk any gaps between the trim and the wall for a seamless finish.
Paint or stain the trim to match your decor. Now stand back and admire your handiwork!
You've built a pocket door frame from scratch! Give yourself a pat on the back, you've earned it.
With some patience, a little elbow grease, and maybe a few choice words, you can conquer any home improvement project!


